I was recently watching an episode of Doomsday Preppers on National Geographic while I was making dinner and I caught a glimpse of a guy who made his own bows and arrow out of readily available materials. Since I didn’t see all the details of how he did it and how well it worked I decided to take what I did see and recreate it as well as I could.
The only part I caught was that he used a fiberglass rod, and a piece of pvc to cover it while taping the fiberglass so it wouldn’t splinter.
The first thing I needed was a fiberglass rod. The only one’s I could think of off the top of my head where the long really flexible ones used to hold flags on the backs of bicycles.
I knew that wouldn’t work so I headed to the hardware store to see what I could find. As usual the hardware store that carried more items than you can imagine disappointed me. I looked all over for a fiberglass rod, asked associates and came home empty handed.
Then I decided I would try the farm, and ranch/feed store in town because I remembered my neighbor having a pole that he used to sort cattle in the pens that I assumed was fiberglass. And they had exactly what I needed. I’ve included a picture of what you should be looking for:
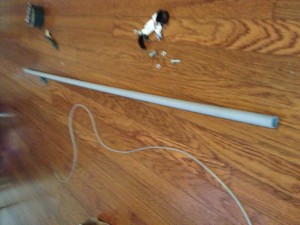
Here is my pile of parts prior to final assembly.
Here are the steps on how I put it all together:
- Prepare your materials- Here is a list of what you’ll need.
- Fiberglass Rod (Mine was 4’ long with a ½” diameter)
- Piece of ½” PVC pipe (or whatever size fits your fiberglass rod, remember you want enough room to wrap the rod with tape before inserting it)
- Tape, I recommend good quality duct tape. Sticky Ass tape is my favorite.
- Bow String. I used an old string from my compound bow I had replaced, but you can use para-cord, or any other string that holds up well. My bow string wasn’t long enough so I used para-cord to lengthen it.
- Brackets to attach string to PVC. I used a ½” conduit mounting bracket that had a rubber back to help it keep from slipping.
- Whatever miscellaneous tools you need for assembly.
- Prep the Fiberglass rod- The fiberglass sorting pole I paid 7.50 for had a rubber handle, and a rubber tip that I removed. Then I wrapped it with 3 single layers of duct tape which made it fit snug inside the PVC.
- Insert rod into PVC pipe- I made mine as snug as possible to make sure it wouldn’t slip out of place while being used. You should need to tap it in with a hammer.
- Attach your system for string attachment- Scroll down to the photos to see how I did mine. You could also use eye bolts- good quality strong ones.
- Prepare your string, and attach it to bow- You’ll need to compress the bow into an arch to attach the string. I recommend having a friend help you because this can be tricky by yourself. It may take a few times to get the string length where you like it.
- Attach handle with arrow guide- You need a way to hold onto it, and you’ll need a rest for the arrow. I used the rubber grip from the cattle sorting pole, cut down the middle and then taped to the PVC pole. The arrow rest can be made of wood, metal, or plastic. You can also buy stick on ones at the sporting good store if you want to.
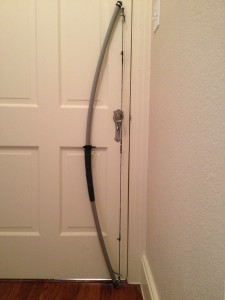
That should pretty much have your bow wrapped up. You can get as detailed with the grip, arrow rest and string attachment as you want. Here you’ll see my first prototype. After I finished it, I tested it in the yard and was very pleased with the results. With a well placed shot it has enough power to take out a deer at 20 yards. 
As far as arrows are concerned… I will buy mine already made. They are much more accurate and durable than ones that you can make yourself out of wood shafts. Plus arrow construction is very time consuming. If I try it myself then I’ll share my results on arrow construction.
If you’ve found any good ways to build your own bow, or improving on this one please let us know on the facebook page www.Facebook.com/PrepCabin.

